Working with the Greenhouse in Planner
The greenhouse in planner allows you to bring in plants from an Image Editor project.
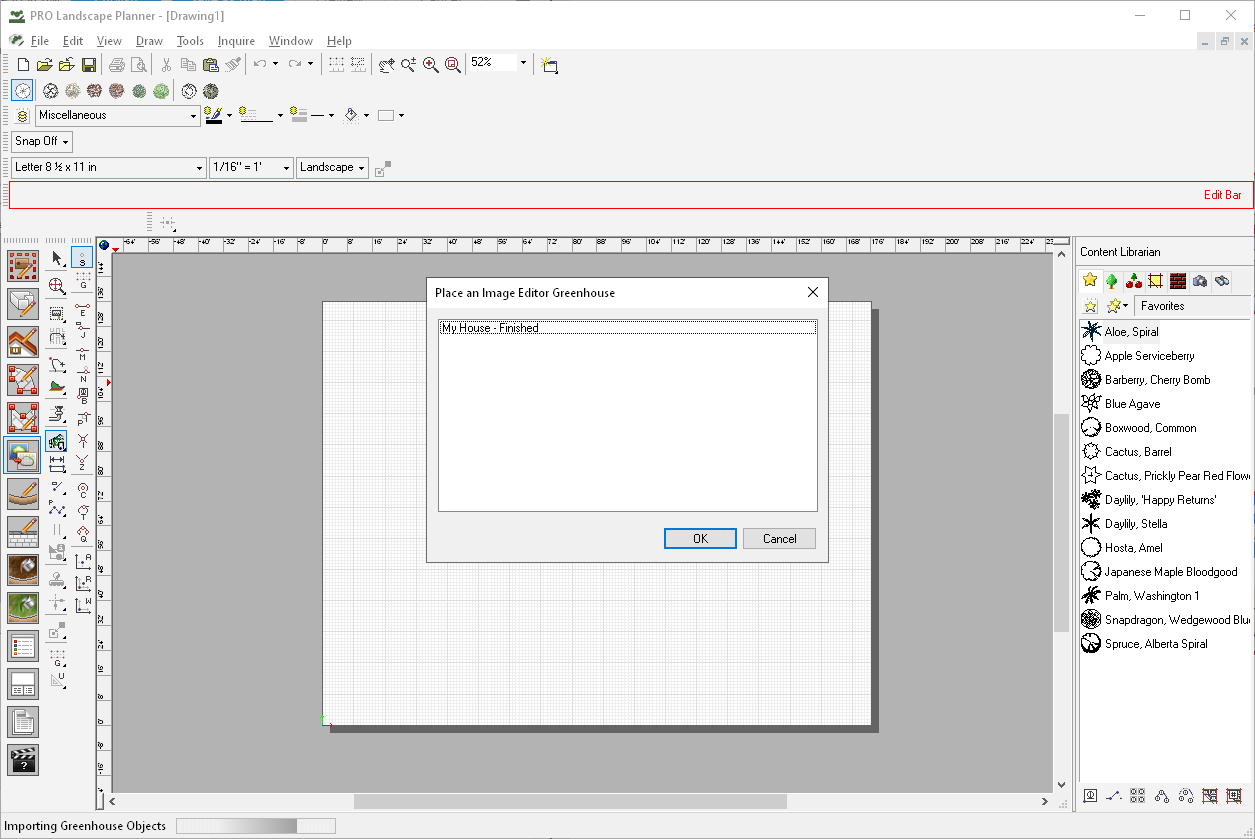
1. Go to the Ezscape toolbar and click on the place Image editor project.
2. A dialog box with a list of projects you have done in Image Editor should come up. Select the project you want to use. Then click okay.
3. You should now see the plants on the design. They may show up in the grey area. That is okay. You can select them and move them to their locations on the design.
Related Articles
Working with the Greenhouse in Image Editor
The Greenhouse tool allows you to bring plants used in Planner automatically over to Image Editor. Open a blank drawing or an existing project. Then go to the Content Explorer and click on the Greenhouse tab. The two important tabs are Open and ...Missing toolbars in Planner
If you accidentally closed one of the toolbars. You can recover them by going to view >> toolbars. You can either check the one you are missing or click on reset interface and it will default to the original settings. ToolbarsCan't get planner to print dark enough to see.
On the printer window. There is a hairline width drop down menu. You may need to try a few down the list.Adding Items to Favorites In Planner
Method 1: Go to a category in the Content Librarian and right click on the plant or object and select Add to Favorites. Method 2: If you have plants or objects on the grid paper while working on a project. You can right click on a plant or object and ...Titleblock button not working
Save your drawing and close the program. Go to the following folder location C:\Users\Public\Documents\PRO Landscape\Original Symbols V24 and copy the file called _TitleBlocks.SLB Then go to C:\Users\Public\Documents\PRO Landscape\Symbols and paste ...